
Creating bead lizards is a fun and creative craft activity that allows you to make your own unique lizard using colorful beads. In this step-by-step guide, we will walk you through the process of making a bead lizard, from gathering the materials to decorating the final product.
But first, let’s understand what a bead lizard is and why you should consider making one. A bead lizard is a small decorative lizard made by stringing beads together in a specific pattern. It can be used as a keychain charm, a decorative accessory, or even a gift for a friend. Making a bead lizard is not only a fun and engaging activity, but it also allows you to tap into your creativity and create something beautiful with your own hands.
Before we get started, let’s gather the materials needed for this craft project. You will need a variety of beads in different colors, sizes, and shapes, a thin wire or string, a pair of scissors, and some glue or adhesive.
Now, let’s get into the step-by-step guide on making a bead lizard. We will guide you through each stage of the process, starting with gathering your materials. Then, we will move on to creating the body of the lizard, adding the legs, attaching the head, and finally, decorating the lizard to give it a unique and personalized touch.
Throughout the guide, we will also provide you with tips and tricks to make the process easier and more enjoyable. So let’s dive in and create your very own bead lizard masterpiece!
Key takeaway:
- Making a bead lizard is a fun and creative craft project that can provide hours of entertainment for both children and adults.
- Creating a bead lizard allows you to express your individual style and creativity by choosing your own colors and patterns.
- This step-by-step guide provides clear instructions and tips to help beginners successfully make their own bead lizard.
What is a Bead Lizard?
A bead lizard is a small craft made of colorful beads. It resembles a lizard and can be used as a keychain, charm, or for display. These bead lizards are popular among craft enthusiasts and children due to their simplicity and versatility.
The origins of bead lizards can be traced back to ancient civilizations. They were believed to bring good luck and protection. Creating bead animals has been practiced for centuries, with bead lizards being one of the most popular designs. Throughout history, bead lizards have been made using clay, stone, and glass, but colorful beads give them their distinctive appearance.
Today, bead lizards are a beloved craft project for all ages. They allow individuals to express their artistic skills and provide a creative outlet. Whether you are a beginner or experienced, making a bead lizard is a fun and rewarding activity. So, gather your materials and let your creativity soar as you bring your own unique bead lizard to life.
Why Make a Bead Lizard?
Making a bead lizard is a fun and creative activity for all ages. It promotes creativity, imagination, and self-expression. Creating a bead lizard allows you to showcase your artistic skills and design a unique lizard. Additionally, it enhances your fine motor skills, dexterity, and hand-eye coordination. This activity can also provide relaxation and stress relief. Moreover, a bead lizard can be a meaningful and personal gift that can be customized according to the recipient’s preferences or used as a symbolic token.
So, why make a bead lizard?
Materials Needed
The “Materials Needed” to create a bead lizard include beads in various colors and sizes, thin wire, scissors, pliers, and glue.
Step-by-Step Guide
Crafting a bead lizard is not only a fun activity but also an opportunity to showcase your creativity. In this step-by-step guide, we’ll take you through the process of bringing this adorable creature to life. From gathering the necessary materials to adding the intricate details, each sub-section will provide you with essential tips and techniques. So grab your beads and let’s dive into the exciting world of bead lizard making!
Step 1: Gather your Materials
Step 1: Gather your Materials
– Assorted beads in varying colors and sizes
– Craft wire or string
– Scissors or wire cutters
– Round-nose pliers
– Marker or pencil
Fact: Bead lizards are a popular craft project originating from Native American cultures. They were believed to bring good luck and protection.
Step 2: Create the Body of the Lizard
To create the body of the bead lizard, simply follow these steps:
- First, gather all the necessary materials such as beads, wire, and pliers.
- Next, choose a bead color that you prefer for the body and carefully string it onto the wire.
- After that, select beads of different colors and shapes to add variety to the body. String them onto the wire while leaving some space between each bead.
- Continue adding beads until you achieve the desired length for the lizard’s body.
- Finally, use the pliers to secure the end of the wire by creating a loop or knot for the lizard’s tail.
Here are some additional tips to enhance your creative process while making your bead lizard:
- Experiment with various bead colors and shapes to give your lizard a unique appearance.
- Take your time to ensure that the beads are securely in place.
- Feel free to adjust the number and size of beads to create a longer or shorter lizard, depending on your preference.
Remember, this guide focuses solely on creating the body of the lizard and doesn’t cover other aspects mentioned in the article title. Enjoy the process of creating your bead lizard!
Step 3: Add the Legs
Here is a guide on how to incorporate Step 3: Add the Legs to your bead lizard:
- Take two small beads for the legs.
- Thread the wire through one bead and slide it to the center.
- Bend the wire at a right angle just above the bead to secure it.
- Repeat steps 2 and 3 to add the second leg on the opposite side.
- Ensure the legs are aligned and adjust the wire as needed for desired length and position.
A pro-tip for adding the legs is to twist the wire at the top of each leg to create a small loop. This will keep the legs secure and prevent them from sliding off.
Step 4: Attach the Head
To attach the head to the bead lizard, follow these steps:
Step 4: Attach the Head
- Take the head bead and the body of the lizard.
- Apply glue to one end of a toothpick.
- Insert the toothpick into the hole at the top of the body, ensuring it is securely in place.
- Apply glue to the other end of the toothpick.
- Slide the head of the lizard onto the toothpick, aligning it properly with the body.
- Press the head firmly onto the toothpick to secure it in place.
- Hold the head in place for a few seconds to allow the glue to set.
- Once the head is attached, you can add additional decorations or details as desired.
By following these steps, you will successfully attach the head to your bead lizard, completing the construction of your craft project.
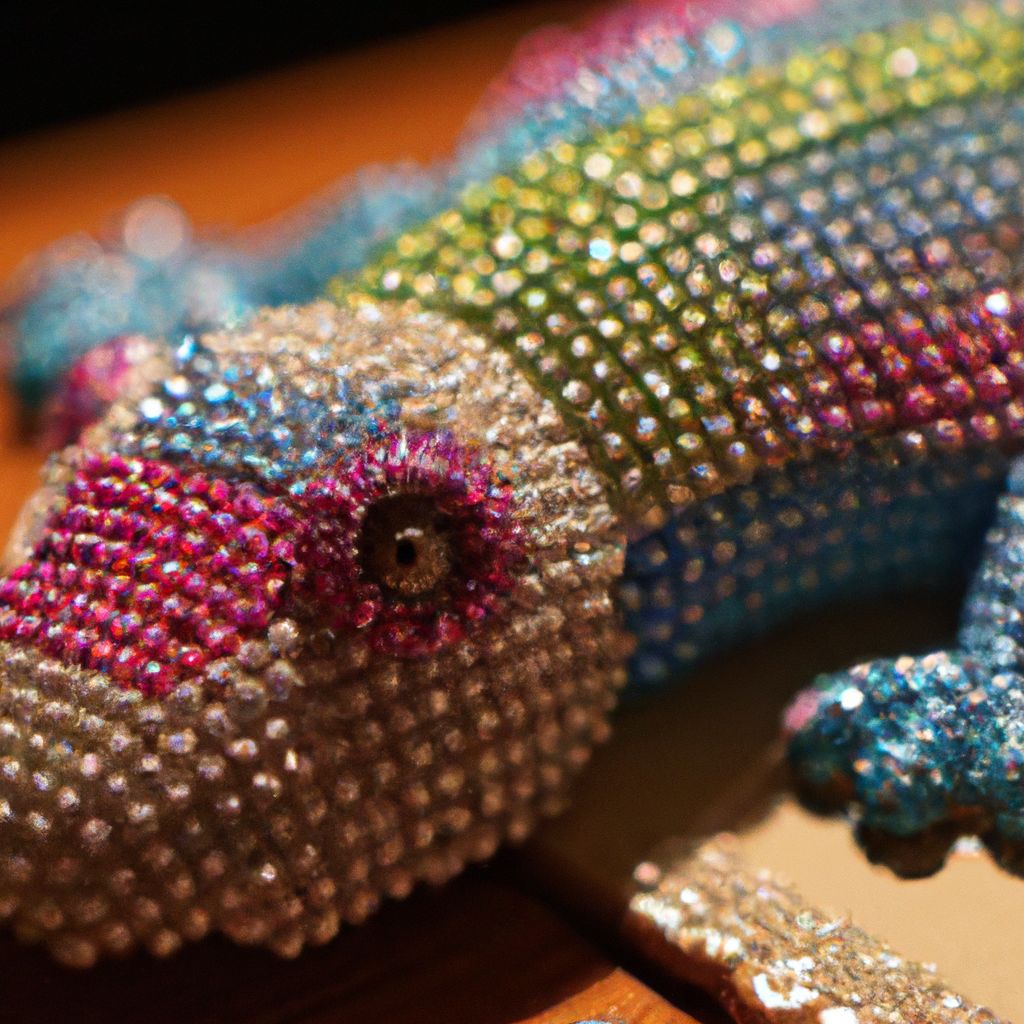
Step 5: Decorate the Lizard
Step 5: Decorate the Lizard
1. Choose desired beads to decorate the lizard, using a single color or different colors.
2. Add beads to the lizard’s body, creating patterns or designs with different colored beads.
3. Continue adding beads to the lizard’s legs, using one color or mixing different colors.
4. Attach beads to the lizard’s head, allowing for unique designs or patterns.
5. Ensure all beads are securely attached.
6. Optionally, add googly eyes or small decorations to give the lizard more personality.
7. Allow the decorated lizard to dry or set before handling or displaying.
True story:
A few years ago, my niece and I made bead lizards as a fun craft project. We followed the step-by-step guide and reached Step 5: Decorate the Lizard. We were excited to choose our favorite colors and create unique designs. My niece made a rainbow pattern with vibrant beads, while I opted for a more subtle color palette. We spent hours placing each bead and discussing design possibilities. When we finished decorating, our lizards looked adorable. It was a wonderful bonding experience, and we still cherish those beaded lizards. Making bead lizards allowed us to explore our creativity and brought us closer through the joy of crafting.
Tips and Tricks
When making a bead lizard, it’s important to keep in mind some tips and tricks.
First, choose the right beads that are the appropriate size and shape for your lizard design.
Consider using different colors to make your lizard more visually interesting.
Plan your design beforehand to have a clear idea of how you want your lizard to look.
This will help you stay organized and avoid any mistakes.
It is also crucial to use a strong thread or cord that can handle the weight of the beads, as they can be heavy.
Nylon or fishing line are good options for this.
After threading each bead, make sure to tie a secure knot to prevent your lizard from unraveling.
If you want to add an extra layer of protection, you can also use a dab of glue to ensure your knots stay in place.
Once you have completed the basic shape of your lizard, consider adding some additional details such as eyes, a tongue, or even small accessories like a bead necklace.
These extra touches will bring your lizard to life.
If you’re new to bead crafting, it’s always a good idea to start with a simple lizard design before attempting more complex patterns.
This will help you build your skills and confidence in this craft.
Some Facts About How To Make a Bead Lizard: Step-by-Step Craft Guide:
- ✅ Lizard lanyards are a fun craft project popular among tweens and teens. (Source: crafts-for-all-seasons.com)
- ✅ The materials needed to make a lizard lanyard include pony beads, lanyard or cord, and a ring. (Source: crafts-for-all-seasons.com)
- ✅ The process begins by stringing beads onto the cord to form a triangle shape for the lizard’s head. (Source: crafts-for-all-seasons.com)
- ✅ The body of the lizard is created by threading beads onto the cord while following a specific color pattern. (Source: fondulaclibrary.org)
- ✅ The legs of the lizard are made by threading beads onto the cord and securing them to create the desired shape. (Source: wikihow.com)
Frequently Asked Questions
How do I make a beaded lizard using purple beads?
Answer: To make a beaded lizard using purple beads, you can follow the step-by-step instructions provided in the craft kit available at the Youth Services Department. The kit contains all the materials you need, including purple beads, string, and a keyring. Simply thread the purple beads onto the string according to the pattern outlined in the instructions, and you’ll be able to create your own unique beaded lizard.
Can I use a craft kit to make a lizard keychain with excess lanyard cord?
Answer: Yes, you can use a craft kit to make a lizard keychain even if you have excess lanyard cord. The craft kits available at the Youth Services Department come with all the necessary materials, including string, beads, and a keyring. You can use the provided string to make the lizard keychain, and any excess lanyard cord can be cut off and discarded.
Are there step-by-step instructions available for making a beaded lizard?
Answer: Yes, there are step-by-step instructions available for making a beaded lizard. You can find these instructions in various sources, such as craft articles, craft tutorials, and the craft kits available at the Youth Services Department. Each source provides detailed guidance on threading techniques, color combinations, and building the legs and body of the lizard. By following these instructions, you’ll be able to create your own reptilian masterpiece.
What size beads are recommended for making a beaded lizard?
Answer: The recommended size beads for making a beaded lizard are pony beads. These beads are commonly used in crafting and are the ideal size for creating lizards. The craft kits available at the Youth Services Department usually include pony beads in various colors, allowing you to choose the color combination for your lizard.
How do I finish the body and tail of a beaded lizard?
Answer: To finish the body and tail of a beaded lizard, you can follow the step-by-step instructions provided in the craft articles or craft tutorials. The process usually involves adding more beads to the body and gradually forming the shape of the tail. Once you reach the desired length for the tail, tie a secure double knot at the end to secure the beads in place. Trim any excess string, and your beaded lizard’s body and tail will be complete.
Can I make a beaded lizard by making a small donation?
Answer: Yes, you can make a beaded lizard by making a small donation. Some craft authors or creators may ask for small donations to help cover the cost of craft supplies. In return for your generosity, they may offer additional perks or incentives, such as a craft ebook as a thank you for donations of $5.00 or more. If you’re interested in supporting the craft community and receiving a craft ebook, you can consider making a small donation when following their craft instructions.