
Drawing a chameleon can be a fun and rewarding art project, allowing you to explore your creativity while learning about this fascinating reptile. With the right materials and step-by-step guidance, anyone can create a beautiful chameleon drawing. In this easy and enjoyable art lesson, we will provide you with all the information you need to draw a chameleon.
First, we will discuss the materials you will need for this drawing. Gathering your art supplies, including pencils, erasers, and paper, is essential to ensure a smooth drawing experience.
Next, we will provide a step-by-step guide on how to draw a chameleon. We will break it down into simple instructions, starting with sketching the body outline, adding the facial features, drawing the limbs and tail, and adding the details that make the chameleon come to life.
To enhance your drawing skills, we will also provide some tips and tricks specifically for drawing a chameleon. This includes observing real chameleon photos to capture their unique characteristics and using different pencil techniques to add depth and texture to your drawing.
Not only will you learn to draw a chameleon, but we will also share some fun facts about these extraordinary creatures. By the end of this art lesson, you will have your very own chameleon drawing and a better understanding of these fascinating reptiles.
So, gather your art supplies and get ready to embark on an easy and fun-filled art lesson on how to draw a chameleon. Let your creativity flow and enjoy the process of bringing this remarkable creature to life on paper.
Key takeaway:
- Drawing a chameleon is easy and fun: Follow the step-by-step guide and gather your art supplies to create your very own chameleon drawing.
- Pay attention to details: To draw a realistic chameleon, observe real chameleon photos and use different pencil techniques to add texture and depth.
- A fascinating creature: Chameleons are interesting creatures with fun facts to discover. Enjoy the process of learning about and drawing these unique reptiles.
Materials Needed for Drawing a Chameleon
Get ready to bring out your creativity and embark on an exciting art adventure as we dive into the materials needed for drawing a chameleon. From gathering your art supplies to unlocking the magic of colors on paper, we’ll explore the essential tools and techniques that will make your chameleon artwork come to life. So, grab your pencils, brushes, and imagination as we discover the key ingredients to create your own chameleon masterpiece. Let’s get started!
Gather Your Art Supplies
Gather Your Art Supplies
To gather your art supplies for drawing a chameleon, follow these steps:
- Start with high-quality drawing pencils. Use graphite pencils ranging from hard (2H) to soft (6B) for shading.
- Invest in a good eraser. A kneaded eraser is perfect for lifting graphite or charcoal marks, while a white plastic eraser works well for precision erasing.
- Have a sketchbook or drawing paper. Choose a size that suits your preference, whether a small sketchbook for quick studies or a large sheet of paper for detailed drawings.
- Include a ruler for precise measurements and straight lines.
- Consider adding colored pencils or markers for color.
- Have a sharpener or sandpaper block to keep your pencils sharp.
- Avoid smudging your artwork by using a smudge guard glove or a piece of clean paper to rest your hand on.
Pro-tip: Experiment with different types of paper to find the one that works best for your drawing style. Some artists prefer smooth surfaces while others enjoy the texture of rough paper. Find what suits you and enhances your drawing experience.
Step-by-Step Guide: How to Draw a Chameleon
Unleash your inner artist with this step-by-step guide on how to draw a chameleon. Get ready to bring this captivating reptile to life on your canvas! In the following sub-sections, we’ll walk you through each stage of the process. From sketching the body outline to adding intricate details, you’ll have all the tools to create a stunning chameleon portrait. So grab your pencils and let’s dive into the colorful world of chameleon art!
Step 1: Sketch the Body Outline
To sketch the body outline of a chameleon, follow these steps:
Step 1: Sketch the Body Outline
Start with a light pencil and draw a large oval shape for the body. Make sure it’s elongated and narrower towards one end for the head and tail.
Next, draw a smaller oval shape at one end of the large oval to create the head.
Add a curved line from the head to the body for the chameleon’s neck.
Draw another curved line from the body to the opposite end for the tail.
Now, add a curved line across the body, slightly below the head, to outline the chameleon’s back.
From the back, draw two long, curved lines on either side for the limbs. Add smaller curved lines at the end of each limb for the toes.
To complete the body outline, draw a line across the bottom, connecting the limbs and tail.
Fun fact: Chameleons change color to communicate, regulate body temperature, and express emotions, not to match their surroundings.
Step 2: Add the Facial Features
When drawing a chameleon, it is important to add the facial features. Here is a step-by-step guide on how to incorporate the facial features:
Step 1: Start by drawing the eyes. Chameleons have large, expressive eyes. Draw two oval shapes for the eyes, leaving space between them.
Step 2: Inside each eye, draw a smaller oval or circle for the iris. Add a smaller circle inside the iris to represent the pupil. This will give the eyes a realistic look.
Step 3: Next, draw the mouth. Chameleons have a unique mouth shape. Draw a curved line below the eyes to create the mouth. Then, add a small line or curve at the end of the mouth to represent the tongue.
Step 4: After the mouth, it’s time to draw the nose. Chameleons have a small, triangular-shaped nose. Draw a small triangle between the eyes and mouth to represent the nose.
Step 5: Finally, add detail to the face. Draw small lines or scales around the eyes and mouth to add texture and dimension to the chameleon’s face.
By following these steps, you can successfully add the facial features to your chameleon drawing and bring it to life.
Step 3: Draw the Limbs and Tail
To draw the limbs and tail of a chameleon, follow these steps:
- Start by sketching the front legs of the chameleon. Draw two curved lines that connect to the body outline, with one line being shorter than the other to depict the varying lengths of the front legs.
- Proceed to draw the hind legs. Begin with two angled lines that extend from the lower body outline. Then, incorporate three toes on each foot by sketching small curved lines.
- Sketch the chameleon’s tail. Initiate from the back of the body and sketch a long curved line that gradually narrows towards the end. Include small triangular shapes along the tail to represent the scales.
- Enhance the details by adding texture and patterns to the limbs and tail. Utilize small lines to illustrate the intricacies. Chameleons usually have bumpy skin, so incorporate short curved lines to create a textured appearance.
Remember to start with light pencil strokes so you can easily make corrections if required. Once you are content with the placement and shape of the limbs and tail, darken the lines for a more defined and finished look.
With practice, you will enhance your confidence and precision in sketching the limbs and tail of a chameleon. Refer to actual chameleon photographs for inspiration and to enhance your ability in capturing the unique characteristics of these captivating creatures.
Step 4: Add the Details
Add the details to your chameleon drawing by following these steps:
- Start by adding texture to the chameleon’s skin using small, overlapping scales for a realistic effect.
- Replicate the unique patterns and colors of the chameleon’s body accurately.
- Draw the eyes and include intricate details like the pupils, eyelids, and reflections.
- Step 4: Add the Details – Capture the characteristic of the chameleon’s long, slender tongue sticking out when including the mouth and tongue.
- Create lifelike limbs and claws by paying attention to placement and proportions.
- Include additional details such as branches or leaves for the chameleon to rest on.
Pro-tip: Refer to real chameleon photos to better understand their anatomy and coloring, which will help you add accurate and realistic details to your drawing.
Tips and Tricks for Drawing a Chameleon
Drawing a chameleon can be both easy and fun, but it requires some tips and tricks to truly bring these amazing creatures to life on paper. In this section, we’ll explore two key aspects that will help you master the art of chameleon drawing. First, we’ll delve into the importance of observing real chameleon photos, allowing you to capture their unique anatomy and distinctive features. Then, we’ll uncover various pencil techniques that can be used to add depth, texture, and realism to your chameleon drawings. Get ready to take your artistic skills to the next level!
Observe Real Chameleon Photos
When drawing a chameleon, it is crucial to observe real chameleon photos. By closely examining these photos, you can accurately capture the distinct characteristics and features of chameleons in your artwork.
To depict a chameleon accurately, pay careful attention to the following:
- Observe the chameleon’s body shape, proportions, elongated body, tapered tail, and curved limbs.
- Study the chameleon’s color patterns and markings, as they have the ability to change and blend into their environment.
- Take note of the chameleon’s facial features, including its large eyes and unique head shape.
- Examine its specialized feet and claws, which are specially adapted for climbing and gripping onto branches.
- Pay attention to any details on the chameleon’s skin, such as scales or texture.
By closely observing real chameleon photos, you will gain a better understanding of their anatomy and physical characteristics. This understanding will enable you to create a more lifelike and accurate representation of a chameleon in your artwork.
Use Different Pencil Techniques
Use Different Pencil Techniques
When drawing a chameleon, different pencil techniques enhance your artwork and bring it to life. Follow these steps to incorporate various pencil techniques in your drawing:
1. Start with a light sketch using a hard pencil, like an H or 2H, to create the basic outline of the chameleon’s body.
2. Use a softer pencil, such as a B or 2B, to add shading and depth. Experiment with hatching, cross-hatching, and stippling techniques to add texture and detail to the chameleon’s skin.
3. Create a smooth transition between different values by using blending techniques. Use a blending stump, cotton swab, or your finger to gently smudge and soften the lines.
4. Add highlights to your drawing with an eraser. By lifting off some graphite, you can create the illusion of shiny scales or reflective surfaces on the chameleon’s body.
By using different pencil techniques, you can achieve a more realistic and visually appealing chameleon drawing. Practice and experiment with shading and blending techniques to find the ones that work best for you. Let your creativity shine through in your artwork.
Fun Facts About Chameleons
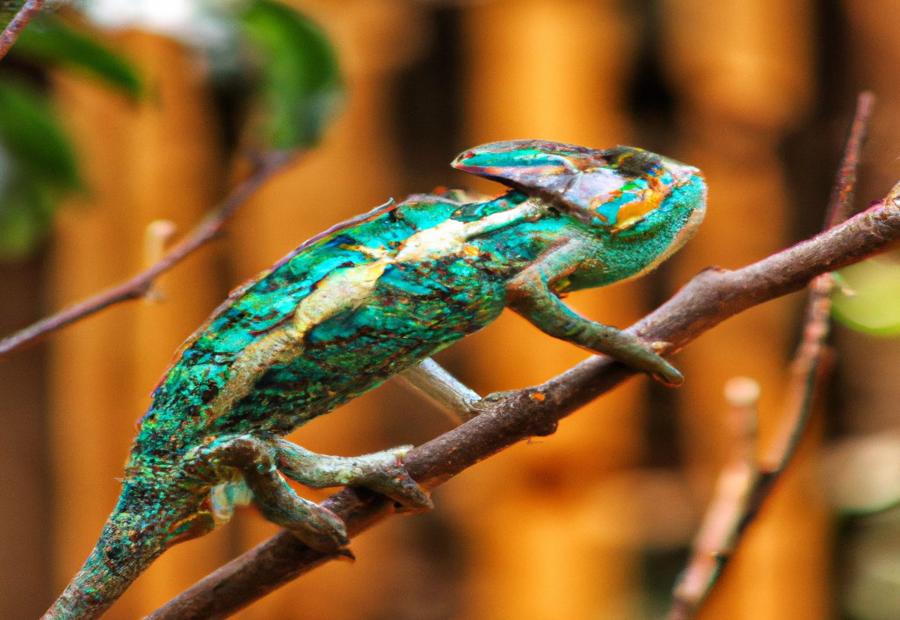
Photo Credits: Ruggedreptiles.Com by William Scott
– Chameleons, known for their ability to change color, use this trait to blend in with their surroundings and communicate with each other.
– One fascinating feature of chameleons is their long specialized tongue, which they can extend quickly to catch prey.
– Some chameleon species have a unique adaptation of independently rotating eyes, granting them a wide field of vision.
– Chameleons can be found in various habitats, including rainforests, deserts, and mountains, primarily in Africa and Madagascar.
– Male chameleons exhibit more vibrant colors than females. This striking display is used to attract mates and establish dominance.
– Chameleons are known for their slow movement, often swaying their bodies and taking one step at a time.
– Equipped with a prehensile tail, chameleons can grip and balance themselves while climbing.
– Although not venomous, certain chameleon species possess a powerful bite for self-defense.
– The lifespan of chameleons can vary, with some living for several years. The Veiled Chameleon, for instance, has an average lifespan of 5-8 years.
– Contrary to popular belief, chameleons change color in response to temperature, light, and emotions, rather than to match their surroundings.
Some Facts About How to Draw a Chameleon: Easy and Fun Art Lesson:
- ✅ Drawing a chameleon involves starting with simple shapes and gradually adding detail.
- ✅ Materials needed for drawing a chameleon include paper, pencil, eraser, and colored pencils.
- ✅ The steps to draw a chameleon include sketching the body, head, tail, legs, and adding details like eyes, mouth, and patterns.
- ✅ There is a teaching video available on YouTube for children to follow along with the drawing process.
- ✅ In addition to drawing, there is a collaboration poster project where students can create a colorful chameleon mosaic/poster/mural.
Frequently Asked Questions
FAQs – How to Draw a Chameleon: Easy and Fun Art Lesson
1. How can I break down complex shapes when drawing a chameleon?
When drawing a chameleon, it’s important to break down complex shapes into simpler ones. Start by drawing a large oval for the body and a circle for the head. Then, draw the tail by swirling it at the end and connecting it to the back of the body. When drawing the legs, use parallel lines and “C” shapes. Breaking down the chameleon into simpler shapes will make the drawing process easier.
2. What materials do I need to draw a chameleon?
To draw a chameleon, you will need paper, a pencil, an eraser, and colored pencils. These materials will help you create a vibrant and colorful chameleon drawing.
3. Are there any resources available to guide me through the drawing process?
Yes, there are resources available to guide you through the chameleon drawing process. You can find instructional videos on websites like YouTube, where step-by-step tutorials are provided. Additionally, some artists offer free drawing guides or membership clubs that provide detailed lesson plans and art standards.
4. Can younger students participate in this art project?
Yes, younger students can definitely participate in this art project. The Art at Home series on Facebook Live offers two variations of the chameleon drawing, specifically designed for different age groups. The simpler variation focuses on line and shape, making it suitable for younger students.
5. How can older students make their chameleon drawings stand out?
Older students can make their chameleon drawings stand out by adding more intricate details and designs. They can experiment with different patterns, polka dots, or stripes to decorate their chameleons. Additionally, they can use different coloring techniques like watercolor paints or markers to add depth and vibrancy to their artwork.
6. Can students collaborate on a chameleon art project?
Yes, there is a collaboration poster project available where students can work together to create a large mosaic/poster/mural of a colorful chameleon. The poster consists of 30 individual pieces that can be colored individually and then assembled. This collaborative project promotes teamwork and creativity among students.
